The whole process is based on using these parts to create a design. So it is important to understand how best to use those parts and their limitations to get the best designs.

This is a grab from my cad file of parts, they don’t look that impressive. but as individual parts they are rather uninteresting. It is combining them into a railing or gate that makes a design. So it is perhaps time to start explaining them in a little detail.
The Twist.
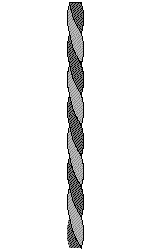
The twist is a very simple part. A 12mm square bar that has a twist in it. Fully Twisted bar can be bought in 6 metre lengths the same as standard bar. This makes it easy to cut it to the desired length. There is no extra work required. As a full length bar it is very cheap. A stock 12mm square 6-meter length is £16, while a fully twisted 6-meter bar is £18.50 (as of September 2026). This minimal price difference makes twisted bars an affordable addition to any railing or gate.
The alternate method is to make the twists by hand, this is much slower and more difficult to do. A hand made twist is almost always used when in conjunction with other parts to form a bar when multiple parts are used in a single bar. You have far more control over a hand made twist, but it comes at the cost of time needed.
The Bushes
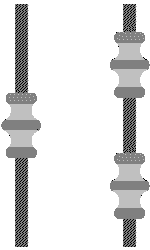
The bush is a stamped out part that is designed to slip over a plain bar and be welded in place, there are variations to the design available. Some are designed for square bars and some for round. The bushes are cheap to buy but they do require welding into the bar properly. So obvious cost more than just the purchase price. Dimensions are 67mm high by 37mm wide
The Diamond
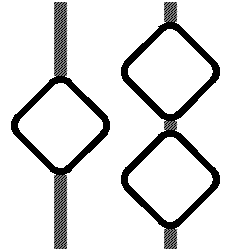
The Square or diamond, is another bought part that is cheap and easy to use. It can act as an interrupt in a bar, effectively cut into a straight bar. It measures 100mm x 100mm in the diagonal position. So it can also be used as a gap filler between bars, where bars are spaced at 100mm apart.
The Basket.
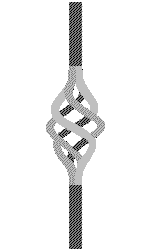
The basket is a weld in part, welding into a plain bar as an interrupt. Dimension are 130mm tall by 60mm wide.
C Scrolls
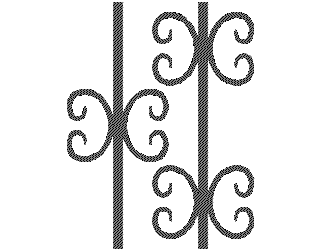
C scrolls are weld-on parts that fit over a bar. Each scroll is 95mm high and 65mm wide. They are usually used in pairs, as shown in the drawing. Because they are small, you can fit two on a single upright bar if the bar is at least 190mm tall. You can fit more on taller bars—for example, a 950mm bar can hold up to 10 pairs.
If you look at the image above you can see that it would be impossible to put two scrolls on adjacent bars at the same height because of the overlap. If they are the same height but if set up the same as the image it is possible.
The ring

The ring works as a break in a bar or to fill gaps between bars. Rings come in many sizes. The standard 100mm size is great for filling gaps. They also come in sizes from 80mm to 150mm, increasing by 10mm. This lets you change the size when used as a bar break, giving you more design options. Allowing a bit of a random type pattern by changing the ring size.
Thing
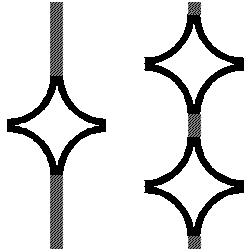
Thing perhaps not the best name but it isn’t actually names on the wholesalers website, so for now “thing” will do. It measures 100mm x 100mm. Can be used as a bar interrupt or as an infill between bars like the ring.
S scrolls
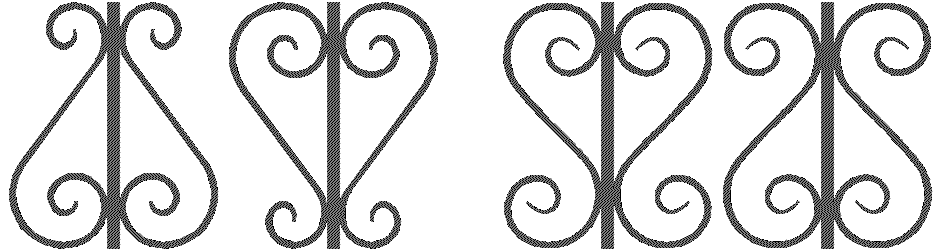
There are two types of S scrolls. The larger part of the Scroll i usually refer to the larger part as the head and the smaller part the tail. As you can see from the first two drawings they they can be either tail up or tail down. The other two scroll are full scrolls or two headed ones if you like as with the other scroll they can be reflected up or down.
Mass-produced scrolls come in a standard 100mm width, with limited height options. Double-headed scrolls are available in 250mm, 300mm, or 400mm heights, while head and tail scrolls offer 200mm, 250mm, and 300mm. Consequently, fitting them can be challenging; for instance, a 275mm upright bar forces you to use a 250mm scroll, resulting in a gap.
This gives some brief details on the parts, hopefully enough to understand how to use them. There are more “parts” available, but the more I add the longer this whole guide gets. This is starting to feel like a novel already. The next step is to show bar possibilities with a price for each unit. This will be broken down into heights of bar. At this point it might be sensible to give an explanation of railing heights and how it all works. It also gives a very brief introduction to top decoration.
Railing height.

The left features rail heads (100mm–130mm tall depending style chosen), the centre uses 100mm scrolls, and the right is a plain ladder. For a 450mm total height, never place railings directly on walls; leave a 40mm–50mm gap, making the unit 410mm. Subtracting 130mm for top decorations leaves the plain ladder section at 280mm. After removing the horizontal bars, your uprights will measure about 250 to 260mm.
For the scroll top decoration, the uprights are going to be around 290mm tall, and for the plain ladder on the right they would be around 390mm tall. This obvious changes the space you have to play with in terms of upright bars and the amount of decoration you can fit into a bar.
450mm tends to be the shortest height, using a standard brick pier and wall, with a soldier coarse of bricks as the capping. Each extra brick added to the pier height adds 75mm to the overall available height. This would be slightly different when using stone capping but brick tends to be the most common.
So it makes sense to show all the various bar options and combinations in 75mm increments, starting from 250mm, Finishing at 625mm, which on the left railing would be a wall railing designed to fit a brick pier around 815mm tall.
A point to note.
The second drawing above perhaps says it all. The decoration does not need to be in the centre of the bar. It can be off set from the centre. This allows for some interesting possibilities. The bar examples presented on the next page are an example, of what can be done. It covers many possibilities but not all.