Bar spacing and gapping.
Bar spacing or the space between upright bars is a crucial element in wrought iron work. Its the part no one explains. There are two main approaches, and neither is inherently right or wrong. The “fixed” spacing method is faster and simpler to execute. On the other hand, the “variable” or “justified” spacing takes more time but results in a more polished and visually appealing finish.
Fixed spacing is classified as economical primarily because it is significantly faster and more efficient to construct compared to justified spacing wrought iron work, which tends to be more time-consuming and complex in its fabrication process. So the choice of spacing method has a big effect on cost. Below is a brief explanation of what we mean by fixed spacing and variable or justified spacing.
Fixed spacing method
This is one of the most common methods used by many online suppliers of wrought iron railings. Typically, website descriptions mention a 100mm spacing between bars or bars spaced at 100mm. This means there is a 100mm gap between each upright bar. While this sounds straight forward, it can lead to issues. Specifically, the gap between the wall and the first upright bar, as well as between the last upright bar and the wall, may not be 100mm. No one mentions that part
The gap between the wall and the end bars depends on the railing’s length. It is the leftover space after the gaps are calculated, since exact division are rare. This gap is always under 100mm,, and is at least 45mm.
The biggest issue with fixed spacing, is that you can not always force a centre upright. This can create complications when it comes to a design pattern. Therefore it puts a restriction on the amount of designs available. When it is just a plain railing or gate with no decorative bars this is not an issue. The speed of construction is a major advantage. Reducing construction time, thus reducing the price. Simply because you can create a spacing tool to set each bar 100mm apart. This means no working out bar positions and having to mark them out on the horizontal bars.
When it comes to a design pattern. you need to make sure you have an even number of plain bars, to every decorative bar. This allow for when you cannot have a centre bar.
This design works for no centre bar but it would also work if there was a centre bar as the basket would then be in the centre. But it does limit your design possibilities.
But it also opens up the possibilities of using mass produced parts, The rings are all 100mm in size and all fit perfectly. As they are mass produced they are far cheaper than making by hand. Fixed spacing does have this massive advantage of using mass produced parts to reduce cost.
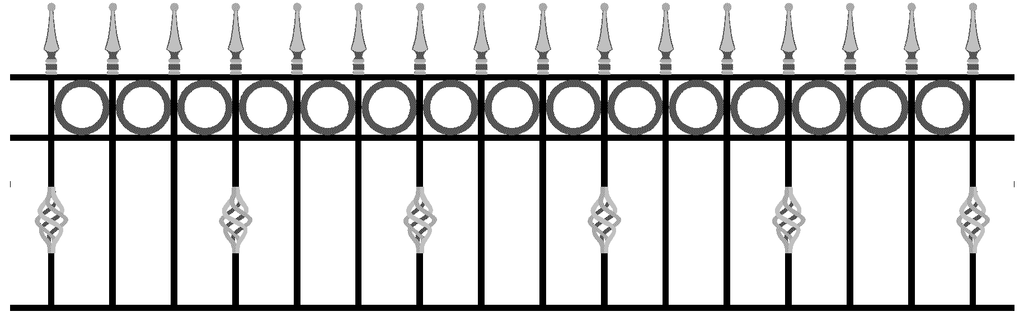
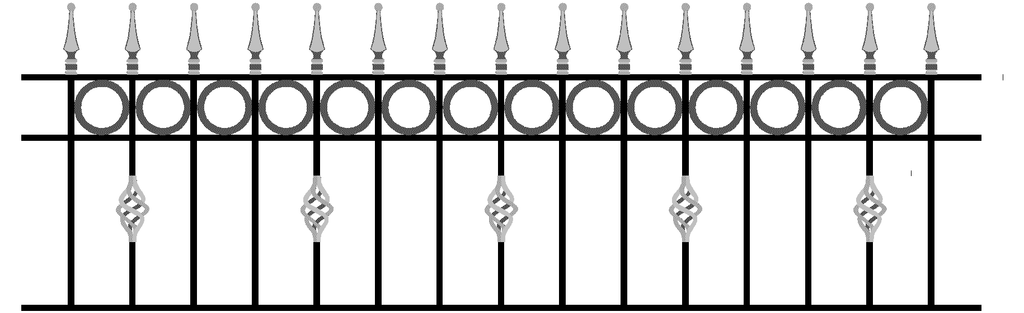
Why use this spacing method? It is much faster to build. It can save up to a third of the time compared to variable spacing, which lowers the cost.You also get access to ready-made parts, many are built for a 100mm gap. Because items like scrolls and rings are already made, they cost less than custom parts. This makes fixed spacing the cheapest choice when trying to construct a decorative iron railing.
Variable or justified spacing method.
I call it variable because the spacing between bars changes as the railing size changes; essentially, it adjusts all the spacing, similar to how a word processor justifies text.
This method is considerably slower because it involves manually marking the position of each upright in the wrought iron railing to achieve evenly spaced and justified bars. Essentially, you first determine the maximum allowable gap between uprights, then use calculations to find the precise spacing.
For example, instead of a 100mm gap, you might get 96mm, depending on the railing’s length. Changing the length changes the spacing, so the gaps between bars vary. But the gap stays the same from the wall to the first post and is uniform all the way to the end. Because of this, you cannot use a standard tool to space the bars, which makes building them take much longer than using fixed spacing.
Visually, it appears far more impressive than fixed spacing, and you often exclude pre-manufactured parts simply because your gap ends up less than 100mm. The biggest downside, of course, is the significantly increased construction time—often by as much as 30%. It’s close to perfection, but it comes at a cost.
Using justified spacing, you can often force a centre bar, which is sometimes essential for achieving your desired design. If dividing the space results in an even number of bars, you can easily add an extra one—provided you don’t mind slightly smaller gaps between them.
In a market where price is often the primary concern, very few online manufacturers use this method. They are consistently undercut on price by those employing the faster fixed spacing technique. Since this process is rarely explained, customers might assume they are comparing like for like.
Just to show the difference between the two, move the slider and watch the results change. This will help you see which type is better for you.
This assumes the maximum allowable gap between bars using the justified spacing method is 100mm. If the gap exceeds 100mm, an additional bar is added, and the gap is recalculated, resulting in a smaller spacing. With fixed spacing, as soon as the gap between the end bar and the wall exceeds 100mm, an extra bar is inserted and the spacing is recalculated accordingly.
Hybrid spacing.
It is possible to mix the two spacing methods together to create a hybrid type spacing. Construction time is the same as the variable spacing. although it can be harder to work out the maths correctly at times.
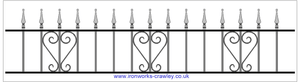
Let say you want to use pre made parts as a method of cost reduction, and you want to force a centre bar in the panel. So you can obtain a design similar to the image. you can set the spacings where the pre made parts go to 100mm. Then divide up what is left. It doesn’t always work as it can end up with crazy results. But often it can end up with say a 100mm gap where premade parts need to go and 90mm where they don’t.
This is a good example of hybrid spacing in use, the customer wanted scroll detail in the panels. Using premade scrolls was an economical option. Having 100mm fixed space would not given a centre upright which was essential to the design.
By using hybrid method it was possible to get a centre bar and get even gaps at the end of the railing. The gaps between the “un-scrolled” bars is smaller than 100mm. About 93mm, but it does not look out of place, and looks part of the railing design.
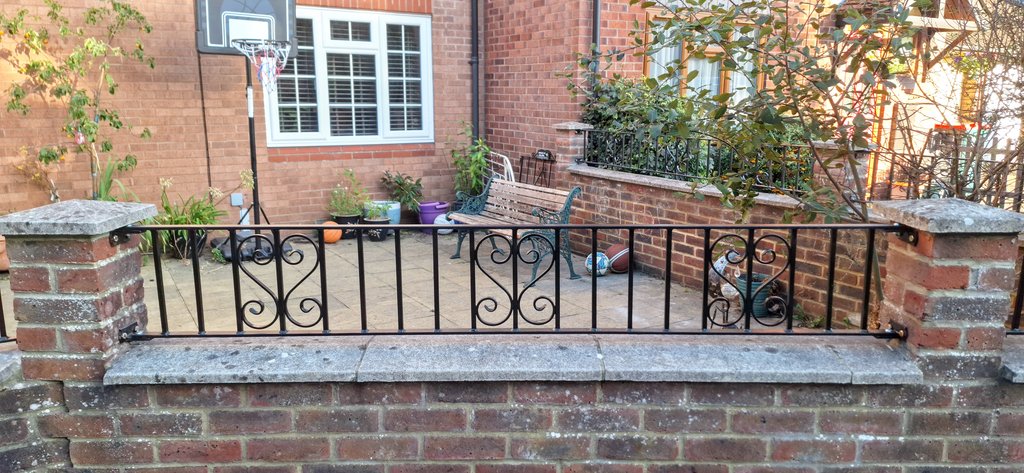
You get the best of both worlds, even spaced bars at the end and the ability to use pre made parts.
The more blocks you need to set at 100mm the more the other spaced bars can become a little crazy, but it certainly works on a panel around 1800mm with 3 double blocks needed for scrolls.
This not a time saving method of construction, as everything has to be manually marked out the same as variable spacing. But it allows access to mass produced parts that require a 100mm space between bars like the scrolls.
notes
Although
While it is possible to create multiple spacing tools for various bar spacings, the cost of materials and time investment is significant. The 100mm spacer tool alone cost nearly £100 in materials, made from steel with aluminium spacer blocks. Although I never tracked the exact time spent, I estimate it took at least 5 to 6 hours to make. This may seem lengthy, but since the tool is reusable, the focus was on achieving maximum accuracy.
To cover a wide range of sizes, each pair of spacer tools should be made in 0.5mm increments, spanning from 100mm down to 90mm apart. This would require producing 20 tools. While it may never be perfectly precise, it would achieve a close fit, with only about a 5mm or 6mm variance at the end bar—likely imperceptible. The main challenge lies in the cost of materials and the time needed, as well as recouping that investment.
More details to be added in future updates
